|

|
Another method
would be to report the greatest profile error as 0.03 (2
X 0.015) since that would be the width of profile of a
surface tolerance that would be required in order for
the part to be accepted. Using this method is similar to
the method used universally to report position errors.
When holes, for instance, are measured, the radial
deviation is determined and then doubled so that it may
be compared to the allowed position tolerance that is
usually stated as a diametral tolerance.
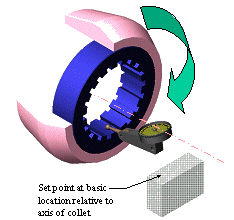
Suppose that when a part was
measured using the method shown above, the greatest
deviation from the set point was 0.015mm. This
measurement was above the set point. In other words
there was 0.015 more material on one of the teeth than
specified by the basic dimension. This could be reported
as a +0.015 since there was more material than the basic
goal. |