Being Clear is as Easy as Being
Cloudy.
A faithful reader of these Tips
called with a question that had caused controversy at his
company. The question dealt with the most appropriate way to
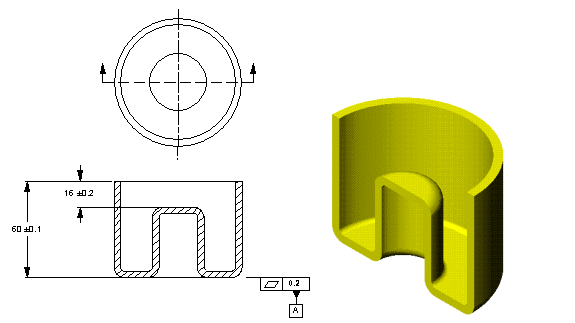
measure the 16±0.2 dimension. Some thought that the
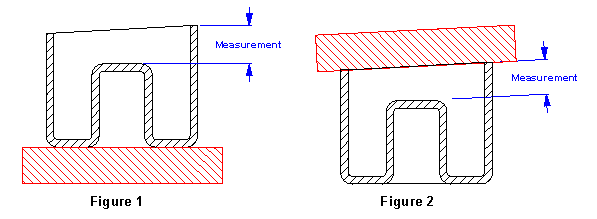
measurement should be oriented relative to Datum A as is shown
in Figure 1. Others thought that since the dimension is shown
from the top of the part, the measurement should be made
oriented relative to the top as shown in Figure 2. The
approach taken would make the difference between acceptance or
rejection of the parts. The real answer depends on whether you
are buying or selling. The drawing is not clear. In other
words, it contains a loophole. Toleranced dimensions do not
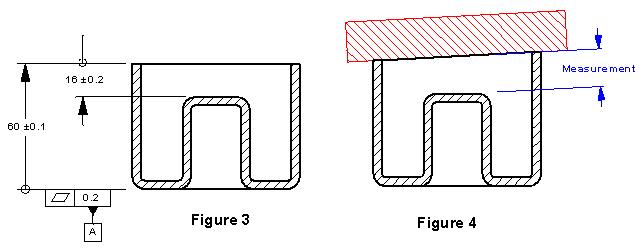
have a clear origin of measurement unless there is a note on
the drawing relating the toleranced dimensions to datums or a
dimension origin symbol has been used as in Figure 3. Figure 1
is not appropriate since there isn't anything to relate the
dimensions to datum A. Figure 2 is another possible
interpretation. The variation of the measurement can change
depending on which feature is used to establish the
orientation of measurement.
|

|
|

|
|

|
| By using the
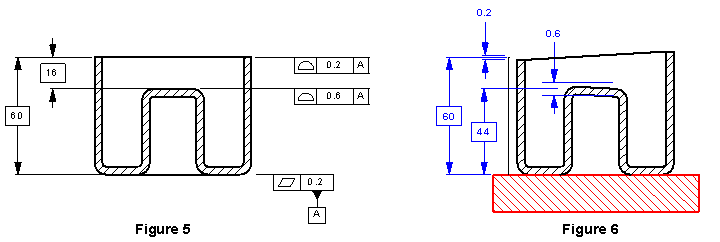
dimension origin symbol, shown above, or a profile of a
surface control referencing a datum, shown below, the
drawing's meaning becomes clear. |
|

|
|